Chromebook Not Connecting to WiFi? How to Troubleshoot and Fix It
Imaging that: you power on your device, get ready to dive into your day, and find your Chromebook not connecting to WiFi. Instead of your usual homepage, you are greeted by an offline warning or a spinning loading icon. Because ChromeOS relies so heavily on cloud-based applications, a dropped wireless connection brings your entire workflow to a sudden, grinding halt.
Fortunately, a network drop does not mean your laptop is obsolete. This is one of the most common issues users face, and the solution is usually simpler than it looks. The root cause can range from a minor OS cache glitch to an IP assignment failure, or even a hardware disconnect. In this guide, we will walk you through seven proven ways to fix your Chromebook WiFi issue and get your connection back up and running, starting with basic software quick-fixes and moving down to advanced technical solutions.
Quick Check: Is Your WiFi Network Actually the Problem?
Before you start digging into your Chromebook’s internal settings, you need to isolate the problem. Is your laptop actually broken, or did your wireless router just crash?
To quickly determine where the fault lies, perform these rapid diagnostics:
Test another device: Try connecting your smartphone, tablet, or another laptop to the exact same WiFi network. If those devices cannot browse the web either, the issue lies with your internet service provider (ISP) or your router, not your Chromebook.
Check the router: Ensure your router’s internet indicator light is solid green. If it is flashing red or amber, give your modem and router a full power cycle by unplugging them for 30 seconds and plugging them back in.
Check your distance: Ensure your Chromebook isn’t too far from the router. Thick walls and household appliances can severely degrade a 5GHz wireless signal.
If your other devices are browsing the web perfectly, your Chromebook is definitely the culprit. Let’s dive into the step-by-step solutions to fix it.
Step-by-Step Guide to Fix a Chromebook Not Connecting to WiFi
When a laptop experiences a ChromeOS network connection error, it is best to try the least invasive fixes first before moving toward options that reset your system data.
1. Turn WiFi Off and Back On (and Restart ChromeOS)
The absolute simplest fix for a hung network stack is to toggle the radio receiver.
Click on the Quick Settings panel in the bottom-right corner of your screen (where the clock and battery icons live).
Click the WiFi icon to toggle it completely off.
Wait roughly 10 to 15 seconds, then click it again to turn it back on.
If the network doesn’t automatically reconnect, perform a standard system restart by clicking the Power icon in that same Quick Settings menu and selecting Shut down. Once fully powered off, turn it back on.
2. Forget and Reconnect to the Wi-Fi Network
Sometimes, stored network credentials or local IP leases become corrupted, resulting in a persistent Chromebook authentication error WiFi loop. Forcing ChromeOS to forget the network clears this bad data.
Open your Settings menu.
Navigate to Network and then select Wi-Fi.
Locate the name of your network, click the small arrow next to it, and click the Forget button.
Let the Chromebook scan the area again, select your network from the list, and carefully re-enter your WiFi security password.
3. Perform a Hard Reset (Hardware Reset)
If standard software toggles fail, you may need to reset the physical controller chips on the motherboard. A hard reset drains residual power from peripheral components—like the keyboard and internal Wi-Fi chip—forcing them to reinitialize without deleting any of your personal files.
To execute a hardware reset:
Turn off your Chromebook completely.
Press and hold the Refresh key and tap the physical Power button.
Keep holding the Refresh key until your Chromebook boots back up, then release it.
4. Clear ChromeOS Corrupted Cache & Update the OS
An outdated operating system can harbor bugs that conflict with modern router protocols. If you can temporarily bypass the issue—either by using an Ethernet-to-USB adapter or by tethering your laptop to your smartphone’s mobile hotspot—go to Settings > About ChromeOS and click Check for updates. Installing the latest software patches frequently irons out stubborn network driver glitches.
Warning: The next step will completely wipe your local drive. Ensure all critical data is backed up before proceeding.
5. Powerwash Your Chromebook (Factory Reset)
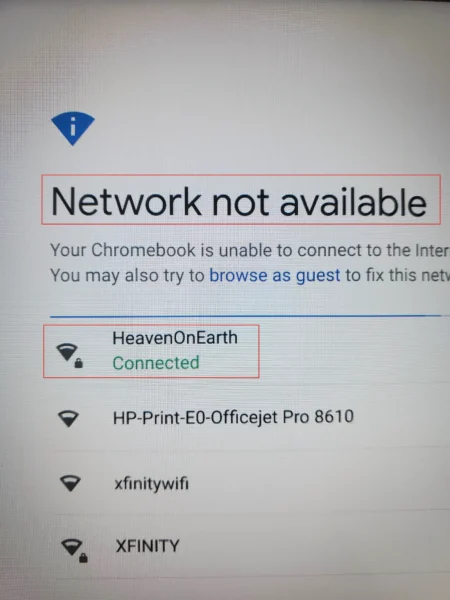
If you have tried all the steps above and are still getting a Chromebook connected to WiFi but no internet message, your system files may be corrupted. A “Powerwash” is the ChromeOS version of a factory reset. It wipes all local profiles and restores the laptop to its factory-fresh state.
To perform a Powerwash, make sure any files in your Downloads folder are safely backed up to Google Drive, then go to Settings > Advanced > Reset settings, and click Powerwash.
Advanced Hardware Troubleshooting: Fixing a Damaged Wi-Fi Card
If you have factory reset your software and the laptop still refuses to look for networks, you are likely dealing with a physical hardware failure inside the chassis.
Symptoms of a Loose or Broken Internal Wi-Fi Card
A major indicator of a hardware fault is when your Chromebook WiFi turned off won’t turn back on. If you click the wireless toggle switch in your quick settings and it instantly flips itself back to the “Off” position, or if the icon is completely grayed out and unclickable, your motherboard can no longer detect the physical wireless card.
How to Inspect and Reseat Your Internal Wi-Fi Card
Laptops are prone to drops and bumps, which can rattle internal components loose over time. You can inspect this yourself by opening the device:
Shut down the laptop, unplug any charging cables, and flip it over.
Carefully unscrew the back case and lift it off to expose the motherboard.
Locate the small, rectangular M.2 wireless card (it is usually about the size of a postage stamp).
Check the two delicate antenna wires (typically one black and one white) snapped onto the card. If they have popped off their metallic terminals, gently snap them back into place.
Common Chromebook Network Error Codes
When your connection fails, ChromeOS usually leaves a clue. Use this quick reference lookup table to target the exact culprit behind your network failures:
| Error Message | What It Usually Means | Quick Solution |
| “Authentication Error” | The entered WiFi password is incorrect or the security protocol (WPA2/WPA3) doesn’t match. | Forget the network, double-check your capital letters, and re-type the security key. |
| “Connected, No Internet” | Your Chromebook is talking to your router, but the router has no active connection to the broader web. | Unplug your home modem/router for 30 seconds; check with your ISP for a local outage. |
| “DHCP Lookup Failed” | The router is failing to hand out a valid IP address to your Chromebook. | Restart your router, or manually assign a static IP address within the ChromeOS advanced network settings. |
| “Network Connection Error” | A general system failure or a sign that the internal Wi-Fi card has come loose from the motherboard. | Run a hardware reset using the Refresh + Power key combination, or check the internal card. |
Next Steps: Diagnosing Component Failure and Motherboard Damage
If you have reseated the Wi-Fi card, checked the antennas, and factory reset the system to no avail, you are likely dealing with motherboard damage. Over time, drops, liquid spills, or electrical surges can crack delicate solder joints or destroy the printed circuit traces that connect the wireless slot to the rest of the board.
Because this network interface slot is permanently integrated into the main system board, a faulty motherboard cannot communicate with an otherwise functional Wi-Fi card. If swapping in a cheap replacement wireless card yields no results, the chromebook motherboard itself is broken, meaning you will need to replace the entire system board or upgrade to a new Chromebook.