Chromebook Won’t Turn On? The Ultimate Hardware Diagnosis and Fix Guide
If your Chromebook won’t turn on, it creates an immediate roadblock for your work, school, or business operations. While a completely unresponsive screen makes it easy to assume the hardware is permanently dead, a device that refuses to boot is frequently just suffering from a temporary power management lock, a deeply drained battery, or a loose internal connector.
This guide cuts through the guesswork. By troubleshooting systematically from external power checks to internal hardware diagnostics, you can pinpoint exactly why your device isn’t responding and deploy the right fix.
Stage 1: Non-Invasive Quick Fixes
Before grabbing any tools to look inside the laptop, we need to rule out software lockups or severe power depletion. When a Chromebook won’t turn on, it is very frequently trapped in a deep sleep anomaly where the hardware is active but the system cannot wake the display.
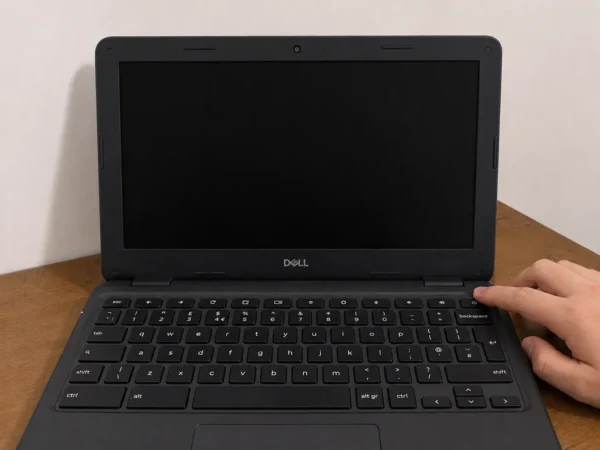
1. Perform an EC Hard Reset (Embedded Controller Reset)
The Embedded Controller (EC) manages hardware responsibilities like power management, battery charging, and keyboard inputs. If the EC crashes, your computer will ignore the power button entirely. A hard reset forces this controller to reboot without erasing any of your personal data.
How to do it: Unplug your charging cable. Press and hold the Refresh key (usually the fourth key from the left on the top row) and then press and hold the Power button simultaneously. Keep holding both buttons down for a full 10 seconds. Plug the charger back in, release the Refresh key, and try booting normally.
2. Revive a Deeply Discharged Battery
If your device has been sitting unused in a drawer or a school backpack for weeks, the lithium-ion battery can enter a protective state known as “deep discharge.” When this happens, the standard 5-minute charge is not enough to register. Your Chromebook won’t turn on until the battery cells receive sustained trickle-charging to wake up their internal chemical properties. Leave the original high-wattage charger plugged in completely uninterrupted for 30 to 60 minutes before hitting power again.
3. Eliminate External Device Boot Conflicts
Sometimes, external hardware draws too much power upon startup or disrupts the BIOS/UEFI boot priority sequence. Disconnect all USB flash drives, external mice, SD cards, and USB-C dongles. If a connected accessory is causing an electrical short or trying to force the system to boot from an empty drive, removing it will immediately solve the problem.
Stage 2: Power Delivery Chain Diagnosis
If the initial quick fixes fail, we must systematically test the hardware path that delivers electricity from your wall outlet straight into the motherboard.
Wall Outlet ➔ Power Adapter ➔ USB-C Port ➔ Internal Battery ➔ Motherboard
4. Read the LED Status Indicator Lights
Locate the small LED light next to your laptop’s charging port. This light acts as a vital diagnostic tool to communicate exactly what is happening under the hood.
No Light at All: Power is not entering the device. The charger is dead, the charging port is broken, or the primary power rails on the motherboard are shorted.
Blinking Red or Orange Light: The battery is critically low, or the system detects a severe battery communication failure.
Solid Green or White Light: The motherboard is receiving full power. If the Chromebook won’t turn on , the issue lies further down the chain in the display or CPU initialization stage.
5. Inspect the Physical USB-C Charging Ports
Take a flashlight and peer directly inside the laptop’s charging ports. Check for pocket lint, dirt, or bent metal pins inside. If dirt blocks the contacts, power cannot flow. Furthermore, because modern devices feature USB-C ports on both the left and right sides, always try alternating sides. It is highly common for a single charging management chip (IC) on one side of a motherboard to fail while the opposite side remains perfectly functional.
Stage 3: Advanced Hardware Troubleshooting
If the LED indicator stays dark and you have verified your wall outlet and charger are working, the issue is internal.
6. Disconnect the Internal Battery to Release Residual Capacitance
Static charges can build up inside the capacitors on the motherboard, causing a state called “circuit lockout.” To clear this, you need to perform a true hard power cycle.
Remove the screws securing the bottom case panel and carefully pry it away using a plastic opening tool.
Locate the main battery pack and trace its wires to the motherboard connector.
Using a plastic spudger, gently slide the battery connector out of its socket.
With the battery disconnected, flip the laptop over, open the lid, and hold down the Power button for 15 to 20 seconds. This safely drains all residual energy remaining in the motherboard components.
Plug the battery back in, reassemble the casing, attach the charger, and attempt to turn it on.
7. Diagnose Display and Backlight Failures
Is your laptop actually dead, or is it just a victim of a Chromebook black screen with a working interior? If the power indicator light turns on, but the screen stays pitch black, you need to check if the computer is running blindly.
The Flashlight Test: Turn the device on in a dark room. Take a smartphone flashlight and shine it at a sharp angle directly onto the laptop screen. If you can faintly see the Chrome logo or login screen background, your computer is on, but the display backlight panel or the internal eDP screen ribbon cable has failed or wiggled loose.
External Monitor Test: Connect an HDMI cable from the laptop to a TV or computer monitor. If you see an image on the external monitor, your motherboard is working perfectly, and you simply need to replace the LCD screen panel.
Stage 4: Motherboard Faults and Component Failure
8. Inspect the Motherboard for Short Circuits
If you have disconnected the battery, tested multiple ports, and the LED lights refuse to respond, look closely at the green motherboard circuit board. Check for any distinct burnt smells, corroded copper areas (often caused by forgotten liquid spills), or blown components that look slightly melted or discolored. If the motherboard has suffered an electrical short on its main power rail, the board itself will likely need to be replaced.
Chromebook Won’t Turn On Frequently Asked Questions
Why is my Chromebook black screen but the power light is on?
This scenario typically indicates that the operating system has crashed, the display brightness is accidentally turned down to 0%, or the screen’s backlight hardware is broken. Try pressing the Brightness Up key repeatedly, or perform an EC reset by holding Refresh + Power to reboot the display controller.
How do you force restart a Chromebook when it is frozen?
To force a hard restart, hold the Power button down continuously for a full 10 seconds until all indicator lights turn off completely. Wait a moment, and then press the Power button once normally to restart the system.
Can a completely dead Chromebook battery prevent it from turning on even when plugged in?
Yes. If an internal laptop battery suffers a severe internal cell failure or short circuit, it can pull down the voltage of the entire motherboard. In these instances, the laptop will refuse to boot even with the charger connected until you physically open the case and unplug the damaged battery pack.
Getting Your Device Running Again
When your Chromebook won’t turn on, remember that it is rarely a total loss. By systematically working your way from the outside in—starting with keyboard shortcuts, moving through charging port checks, and ending with an internal battery reset—you can fix the vast majority of boot-up failures on your own.
If you discover that an internal component like an LCD panel, a daughterboard, or the battery pack has failed completely, don’t throw the machine away. Sourcing high-quality replacement chromebook parts in Laptop Defenders and performing a manual swap is an affordable, rewarding way to extend the lifespan of your laptop and get it right back to work.