Chromebook Won’t Charge? 4 Diagnostic Steps Before Buying a Chromebook Replacement Battery
Few things are more frustrating than a school or work laptop that refuses to turn on. You plug in your device, wait a few minutes, and press the power button—only to be met with a completely black screen or a blinking orange light.
When a device stops holding power, it is easy to assume that the internal power cells are completely dead. However, rushing to buy a brand-new component right away might be a waste of your time and money. Sometimes, the real culprit is a faulty wall adapter, a loose USB-C port, or a temporary glitch in the system’s power management firmware.
Before you open up your laptop casing or spend money on new hardware, follow these 4 proven diagnostic steps to find out exactly why your Chromebook won’t charge—and learn how to determine if you genuinely need to buy a brand-new Chromebook replacement battery.
Step 1: Troubleshoot the Adapter When a Chromebook Won’t Charge
Before blaming the internal hardware elements, you must eliminate the external power variables. Laptop chargers endure a lot of wear and tear, especially in K-12 school environments where they are shoved into backpacks, stepped on, and bent daily.
Check the Physical Connections: Ensure the charging brick’s wall plug is firmly seated in the outlet and that the detachable cord is fully pushed into the adapter brick itself.
Inspect the Cable for Damage: Run your fingers down the entire length of the cable. Look for exposed wires, sharp kinks, or bite marks from pets.
Try an Alternate Port: If your device has USB-C ports on both the left and right sides, switch sides. If one port charges but the other doesn’t, your power pack is fine—the issue is a localized port failure.
The Cross-Test: Plug your charger into another compatible device (like a smartphone). If it charges the phone, the charger works. Alternatively, try charging your laptop with a verified, working 45W or 65W Type-C adapter to see if the Chromebook won’t charge on that plug too.
If you discover that your laptop powers up normally with a different cord, your internal cells are perfectly healthy. It is simply time to retire your old power brick.
Step 2: Check the Port If Your Chromebook Won’t Charge
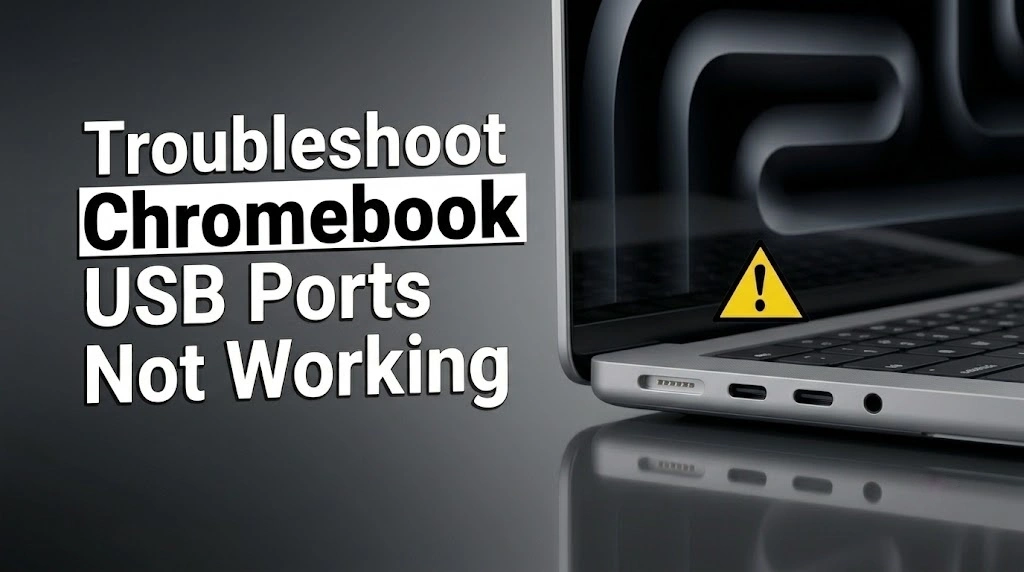
If the charger itself functions normally, the next vulnerable point is the physical connection where the cord meets the laptop housing. If this interface fails, your Chromebook won’t charge no matter how long it stays plugged into the wall socket.
Take a close look at the charging indicator LED light on the side of your laptop. Does it blink erratically when you gently wiggle the inserted plug? Does it refuse to light up entirely?
Gently peer inside the laptop’s USB-C or barrel port using a flashlight. Check for:
Lint, dirt, or pocket debris packed tightly into the back of the port opening.
Bent, missing, or corroded copper pins inside the slot.
A distinct burning smell, indicating an electrical short circuit.
The Good News for Repair Budgets: On many popular models—such as the Dell Chromebook 3100 or HP Chromebook 11A G8—the charging ports are not permanently soldered onto the expensive main motherboard. Instead, they reside on a small, highly affordable separate circuit board called a daughterboard. If the port is physically broken, you only need to swap out this cheap sub-board rather than purchasing a brand-new Chromebook replacement battery or motherboard.
Step 3: Run a Crosh Test Before Buying a Chromebook Replacement Battery
If your laptop can stay turned on while plugged into the wall, but dies the exact millisecond you unplug the cord, you can use ChromeOS’s powerful built-in diagnostic tool to read the true internal power metrics. Running this test will help you decide if you actually need to purchase a Chromebook replacement battery.
This hidden tool is called Crosh (ChromeOS Developer Shell), and accessing it takes less than ten seconds:
Turn on your laptop and log into your user account.
On your keyboard, press the Ctrl + Alt + T keys simultaneously. A black, terminal-style browser window will open.
Next to the crosh> prompt, type the following command exactly: battery_test
Press Enter.
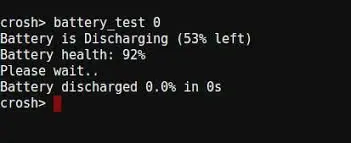
How to Read Your Results:
Battery Health Percentage: This number tells you how much energy your power cells can hold compared to when they left the factory. If your health score is below 60%, the internal lithium-ion cells have degraded severely. It will drain rapidly and you will notice that your Chromebook won’t charge up to a usable level.
Cell Imbalance or Failure Alerts: If Crosh returns an error message saying the internal hardware cannot be read, or if the health reads 0%, the safety circuit inside the pack has permanently tripped.
Step 4: Reset the Hardware When a Chromebook Won’t Charge
Sometimes, the hardware components are completely fine, but the computer’s internal software brains get confused. Every device features a tiny microchip called an Embedded Controller (EC), which regulates power, charging, cell levels, and keyboard inputs. If the EC freezes, your laptop will stop recognizing its power supply and your Chromebook won’t charge.
You can fix this bug by forcing a hardware reset (also known as an EC Reset), which drains residual electrical current and reboots the chip without deleting any of your personal files:
Turn off your laptop completely by holding down the power button.
Unplug the charging cable from the laptop body.
Press and hold down the Refresh key ( ⟳ ) (usually located on the top row of the keyboard, above the 3 or 4 keys).
While holding the Refresh key, press and hold the Power button.
Keep holding both keys down together for 5 to 10 seconds.
Release both keys at the same moment, plug your charger back in, and look at the LED indicator light to see if it fixes the issue.
For many users, this simple button combination forces the system to wake up, transforming a dead device into a functional laptop instantly.
The Verdict: When to Purchase a Chromebook Replacement Battery
If you have carefully worked through all four steps above and encounter any of the following scenarios, your power cells have officially reached the end of their life cycle and you must purchase a Chromebook replacement battery:
The device passes the charger test, but the charging LED remains dead or blinks a warning color continuously.
The system works perfectly while plugged in, but cuts to a black screen instantly when the cord is pulled out.
The internal Crosh health test reports a percentage well below acceptable limits or shows a permanent cell error.
The Safety Warning Sign: The physical touchpad feels stiff to click, or the lower plastic casing of the laptop appears slightly warped or bulging. This indicates a swollen power pack, which poses a safety hazard. If you notice swelling, remove the old unit immediately and recycle it safely.
How to Choose a Chromebook Replacement Battery
When buying tech accessories online, compatibility is everything. Simply searching for a generic laptop power pack is a recipe for receiving the wrong shape, size, or connector wire. Manufacturers frequently change internal layouts between different generations of the exact same laptop model.
To guarantee a perfect fit when ordering your Chromebook replacement battery, unscrew the bottom case of your device (the D-panel) to inspect the label printed directly on the black casing. Look for a specific alphanumeric sequence labeled as the Type, Model Number, or Part Number (for example, Type JK6Y6 on certain Dell models, or 3ICP4/91/91). Matching this number ensures a perfect, stress-free DIY installation.